
With apologies to Jackie Gleason, "And awaaay we go . . ."

Here's where we're going to end up, to give you a little incentive to come along for the ride.

And here's what you'll need to get there:
Cardstock:
5½” x 8½” cardstock – Wausau Astroparche Parchment – Shell pink
4” x 5¼” cardstock – Kromekote – white glossy
2¾” x 3¼” cardstock – Kaleida-Paper – dark red (80#)
2-1/2” x 3” cardstock – Cougar Opaque – natural (80#)
¾” x 5½” cardstock – Stardream - antique gold
Stamps used:
- Stampers Anonymous – Mona’s sketchbook (CMS 010)
- Stampers Anonymous – “Breathe” (K1-637)
Other supplies that will be used:
- Marvy reinkers and ink pads - #2 red, #5 yellow and #7 orange
- Ranger dye ink pad – espresso
- PearlEx – interference red
- Gold webbing spray
- Mini mister bottles
- Sponges and sponge tip applicators
- Crimper

Mix a few drops of yellow dye reinker in a mister bottle and fill with water. Prepare two additional misters – one filled with orange and one filled with red ink.
Spritz the glossy cardstock with yellow, orange and red misters. Dab with sponge or paper towel to create texture and absorb excess moisture.

Add touches of Pearl Ex for highlights if desired while cardstock is still slightly damp.

Spray lightly with webbing spray to create veining. When dry, adhere to card front.

Crimp gold strip, trim if necessary and adhere to left side of card front.
Stamp “Breathe” with espresso ink. Add highlights with red, orange and yellow ink using sponge daubers. Mat with dark red cardstock and adhere to card front with foam tape.

Stamp verse inside of card using espresso ink.

Finished product!

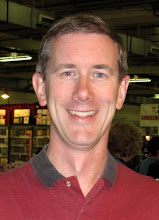
And here's proof that Connie gets the assist here -- I had to go back into the archives and find a picture I took of her at a previous make it/take it. Thanks!

Great job, Connie...wish I was there to actually take the class. Loving that the sample comes first!
ReplyDeleteI just wanted to tell you guys how much I enjoyed Susan Pickering Rothemel at your booth in Springfield MA this past weekend. My friend and I have been going for about 6 years to this stamp show. This year was considerably smaller, but better- more focused- great stuff! But meeting Susan and watching her work was a real highlight. And I spent waaaay too much $$ at your booth- I HAD to have all of the great items she was demoing! Keep up the good work...
ReplyDeleteand on another note- I ordered 140# watercolor paper/stratmmore envelopes for my daughters wedding last months from Gary- please tell Gary that the invitations are beautiful and all was a great success- thanks to him for his help!
all the best, Elizabeth Parsons
www.allthingspaper.com
(a real fan of Marco Paper!)